Wednesday, December 23, 2009

Error: Content deployment job '<Job Name truncated>' failed.The remote upload Web request failed

Error: 
Content deployment job '<Job Name truncated>' failed.The remote upload Web request failed

Reason:
You will get this error, when you are trying to deploy the content from one sharepoint server to another. You will get this 
error, because the destination server name/IP may not be resolved by the deployment job.

Solution:
1. Go to your destination server desktop.
2. Right click on the "My Computer"
3. Click on "Properties"
4. Go to "Computer Name" tab.
5. Copy the Full Computer Name as shown below:


6. Open your host file from "c:\windows\system32\drivers\etc\hosts" in NotePad. (In Source Server)
7. Paste the Server name along with IP address at last as below: (Do not delete/move other texts)


8. Now run the content deployment.

Thats it.

Thursday, December 17, 2009

SharePoint: Custom validator or InputFormCustomValidator, Which one is best?

In some scenarios, you are in a situation to use "CustomValidtors" in your SharePoint WebPart coding (object model). This is very common situation to handle/validate our webpart controls using default validation controls.  

But, in SharePoint object model, "CustomValidator" won't fire perfectly in most of the scenarios. Then what to do?

Microsoft Provides an another control called "InputFormCustomValidator". Just explore all the features by using this control. Some of the key points are:

1. For InputFormCustomValidator, we need not to assign the "ControlToValidate" property.
2. We can enforce the "Page.Validate();" method on button click method.


Friday, December 11, 2009

Error: The protocol handler cannot be found. Check that the handler has been installed.

Scenario:

You will get this error, when you are trying to "Crawl" the content in SharePoint SSP.

Solution

1. Go to Services in the SharePoint server (type "Services.msc" in command prompt and preses  'Enter')
2. Stop the "SharePoint SHarePoint server search", "Windows SharePoint Services Search" & "Windows SharePoint Services" Timer.


3. Start all the 3 services again.
4. Reset the IIS

Thats it...

Monday, December 7, 2009

Error: The form submission cannot be processed because it exceeded the maximum length allowed by the Web.

Error:
The form submission cannot be processed because it exceeded the maximum length allowed by the Web.

Reason:
Whenever you are trying to upload a file into the SharePoint with more than 50MB, you will get this error. 
You can not fix this issues, even if you updated the tag in web.config file.

Solution:

1. Go to Central Admin


2. Open "Web Application Gegenal settings" link
3. There is an option to enter the maximum file size. type 100 MB in that text box. Don't forget to change the web application in the dropdown box.


4. Also, change the HttpRuntime in the web.config as follows:
 <httpruntime maxrequestlength="102400" executiontimeout="3600"></httpruntime>
 

Thats it...


Thursday, November 19, 2009

Error: The application is unable to accept further updates because the last attempt to persist the state failed. See the event log for more details

Error:

The application is unable to accept further updates because the last attempt to persist the state failed. See the event log for more details

Solution:
Sometimes you will get this error, when you configure the search in sharepoint server. Do the below steps, one by one.

1.  Go to central admin 
2. Go to Operations Tab.
3. Click on "Services on Server" link and Stop the "Office Sharepoint Server Search"
4. Again, start the "Office Sharepoint Server Search".
5. Go to SSP & Search Settings.
6. Here you have to configure again the search settings. 
7. Then, It will take few minutes to complete teh operation. (based on the Timer execution).

Thats it...


Thursday, October 29, 2009

How To: Reduce SharePoint database log file size?

Sometimes, your SharePoint server space may be very low. This is because, the SharePoint server database log will be increased slowly day by day. 

For example, you may have 30 or 40 GB free space in C drive, when you installed SQL Server in your database server. After 1 or 2 months, your database server C drive may be very low. So that you will get "Low disk space" error. This is beacuse, the log file size will be high.

So, here I am going to explain, how to reduce the size of the Database log file size to 1MB. 

1. First open your SQL Server management studio 2005.
2. Click "New Query"
3. Type the below Command. Here, "WSS_Content_10002" is my database name. replace this text with your database name.

BACKUP LOG [WSS_Content_10002] WITH TRUNCATE_ONLY
USE [WSS_Content_10002]
GO
DBCC SHRINKFILE ('WSS_Content_10002_log' , 1)  
GO

Finished. Now, you can see that the free space in C Drive will be increased.

Thats it....

Friday, October 23, 2009

How To: BreadCrumb to show sub folders in Document Library


Usually, you cannot see the breadcrumb for the Sub folders which are stored in the Document Library. You can see the Breadcrumb links only up to Parent folder (i.e. document library).

So, how to modify the breadcrumb to show the Sub folders too?. 

Well.. 

1. Open SharePoint Desigenr 2007
2. Open that specific web site
3. Go to that document library. Inside you can see a folder with the name of "Forms".
4. Double click to open it. 
5. Double click on "AllItems.aspx" file.
6. Within that source, you can see the below code. sometime, the below code will not be available. If the code is not available, add the below code in between any of the 2 Content blocks.


<asp:Content ID="Content1" ContentPlaceHolderId="PlaceHolderTitleBreadcrumb" runat="server">
<div class="breadcrumb">
<asp:SiteMapPath ID="siteMapPath1" Runat="server" SiteMapProvider="CurrentNavSiteMapProviderNoEncode"
RenderCurrentNodeAsLink="false" SkipLinkText="" CurrentNodeStyle-CssClass="breadcrumbCurrent" NodeStyle-CssClass="ms-sitemapdirectional"/>
</div>
</asp:Content>


7. Change the SiteMapProvider value as "SPContentMapProvider" instead of "CurrentNavSiteMapProviderNoEncode"

See the Sample Code below:
<asp:Content ID="Content1" ContentPlaceHolderId="PlaceHolderTitleBreadcrumb" runat="server">
<div class="breadcrumb">
<asp:SiteMapPath ID="siteMapPath1" Runat="server" SiteMapProvider="SPContentMapProvider"
RenderCurrentNodeAsLink="false" SkipLinkText="" CurrentNodeStyle-CssClass="breadcrumbCurrent" NodeStyle-CssClass="ms-sitemapdirectional"/>
</div>

See the  below sample result page:


Good luck...

Tuesday, October 20, 2009

How To: Add Custom Menu Item in Context Menu (MOSS 2007).


Sometimes, you may have to add new custom menu item in the SharePoint list context menu. See the below image for an example:


(click image to enlarge)

This can be achieved through the "Content Editor Webpart".

1. Open SharePoint Designer.
2. Open SharePoint site (ex: http://172.16.10.10:2002)
3. Go to that specific page and edit that page
4. Click on "Task Panes" in SharePoint  Designer and open "ToolBox"
5. In the "ToolBox" pane, explore "Webparts" title.
6. There, you can see a hyperlink as "Open the webparts task pane". Click on it.
7. Insert the "Content Editor Web Part" from the newly opened task pane.
8. Write the below code inside the "Content" tag of the "Content Editor Web Part".

Code:
&lt;![CDATA[<script language="javascript">
/*
* @ Desc: Adds a custom menu items into the menu
*/
function Custom_AddListMenuItems(m, ctx)
{
 var str = currentItemID; 
 var strDisplayText = "Navigate Project workspace";
 strUrl = "Default.aspx";
 var strImagePath = "";
 strAction = "STSNavigate('http://" + location.host + "/ItemWorkspaces/Project/"+ strUrl+"')"; 
 // Add our new menu item
  CAMOpt(m, strDisplayText, strAction, strImagePath);
  // add a separator to the menu
  CAMSep(m);
  // false means that the standard menu items should also rendered
  return false;
}
</script>]]>

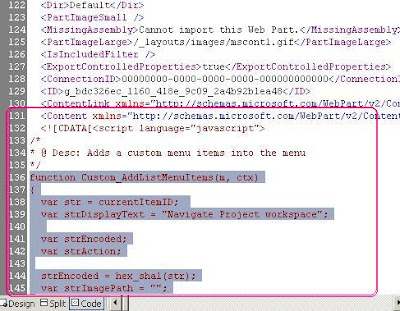
See the below image, that will explain how i have added the code into the Content Editor Web Part.


Thats it....

Monday, October 19, 2009

How To: How to redirect to custom Edit Page in MOSS 2007 ?


Usually, the Edit page of the "Sharepoint List" will be like three columns. First column will be a lable of the field, second column will be the seperator, third column will be the field control like Text box, calender control or people picker, etc... 

Sample Edit Form


Sometimes, you are in a situation to modify the look and feel of "Edit" page of list/document library  like the below image.


This can not be done in MOSS by editing the EditForm.aspx page. Instead, we can create a Blank Webpart page (ex: EditAsset.aspx) and we have to insert our customized Web Part. OK. We have created a page to modify the Content of the List/Document Library. But, How to redirect the users to this page, whenever they are trying to edit the list?

Well. This can be done in 2 ways. 
1. We have to add custom menu item in context menu of the list/document library, wherever we are displaying the content. (This is very difficult. because we have to add javascript in each and every page, if we are going to display the list)

2. Redirecting to our Custom Edit Page from EditForm.aspx page

Second approach is easy one to follow. So, I will tell you how to redirect from EditForm.aspx page.

1. Open SharePoint Designer 2007
2. Open the Website
3. Go to the Document Library/List.
4. Go to "Forms" folder inside the document library.
5. Open "EditForm.aspx"
6. Insert one "Content Editor Web Part"
7. Write the below code inside the Content Editor Web part.

Code:


<![CDATA[<script language="javascript">

var query = window.location.search.substring(1);
var vars = query.split("&");

var2 =vars[0].split("=");

location.href = '/Pages/EditAsset.aspx?EditID=' + var2[1];
</script>]]>


So, The page will be redirected to our custom edit page. 

In the above code, i have splitted the querystring from EditForm.aspx and sending the value to My "EditAsset.aspx" as a querystring parameter. 

See my below image, that will explain how to add the code in the sharepoint designer.


(Click on the image to enlarge)

Thats it...

Thursday, October 15, 2009

Error: A Single Sign-on error has occurred. Please contact an administrator. Details: Could not find domain controller for this domain

Error:
A Single Sign-on error has occurred.  Please contact an administrator.  Details: Could not find domain controller for this domain.

Reason:
You will get this error, when you are trying to configure the SSO (Single Sign-On) in MOSS 2007. The reason is the specified account may not be a member of "Domain Controller" group.

Solution:
Ask your network administrator to add the specified user account into the "Domain Controller" group in the Active Directory. 


Monday, October 5, 2009

Error: System.Data.SqlClient.SqlError: The media family on device 'C\WSS_Content' is incorrectly formed. SQL Server cannot process this media family.

Error: 
System.Data.SqlClient.SqlError: The media family on device 'C\WSS_Content' is incorrectly formed. SQL Server cannot process this media family.

Reason:
Sometimes you will get this kind of error, while you are trying to restore the backup of Sharepoint Content Database in SQL Server 2005. But the back up content may be taken from SQL Server 2008. This is the cause of the issue.

Solution:
Open SQL Server 2008 Management studio and Restore the database.


Thursday, October 1, 2009

Error: No Excel Calculation Services is available in the farm.

Error:

Sometime you will get error like below, while you are loading excel sheet in your SharePoint Excel Web Access web part.

1. No Excel Calculation Services is available in the farm.

(or)

2. There was an error in communicating with Excel Calculation Services http://SenMoss:56737/SharedServices2/ExcelCalculationServer/ExcelService.asmx exception: The request failed with HTTP status 503: Service Unavailable.

(or)

3. Unable to reach Excel Calculation Services http://SenMoss:56737/SharedServices2/ExcelCalculationServer/ExcelService.asmx.

Reason:
Your IIS application pool for Excel Calculation services may not be enabled. 

Solution:

1. Go to IIS (Type "InetMgr" in Command Prompt")
2. Open "ApplicationPools" node 
3. Select "OfficeServerApplicationPool".
4. Right Click on ir and select "Start"


Tuesday, September 29, 2009

Error: Cannot make a cache safe URL for "createsilverlghtobjects.js", file not found

Error:
Cannot make a cache safe URL for "createsilverlghtobjects.js", file not found.

Reason:
You may not copied the "createsilverlghtobjects.js" into "_layouts" folder. You may be modified the "_Layouts" site path to some other location, instead of default location like 
"C:\Program Files\Common Files\Microsoft Shared\web server extensions\12\TEMPLATE\LAYOUTS_10002\".

But silverlight application will look into the physical path of "C:\Program Files\Common Files\Microsoft Shared\web server extensions\12\TEMPLATE\LAYOUTS\1033" folder.

Answer:
So, put that  "createsilverlghtobjects.js" file or someother required files into "C:\Program Files\Common Files\Microsoft Shared\web server extensions\12\TEMPLATE\LAYOUTS\1033" folder. 

Friday, September 25, 2009

How To: Integrating Silverlight User Control with SharePoint WebPart (MOSS 2007)

Silverlight with MOSS 2007
Developing a webpart may be very simple. Likewise, Developing a Silverlight application also will be very simple. But, If you are going to integrate both areas, that will be difficult little. Here, I am going to tell you that what are necessary steps that needs to be followed, while integrating the MOSS & SILVERLIGHT.

OK. See the steps below. (I assumes that you are familier with creating SharePoint webpart & creating sivlerlight Web applications.)

1. Whenever you are creating Silverlight applications, you can see a "Silverlight.js" file in your "Web" folder. For example, if your application name is "HelloWorld", your visual studio will create another folder with the name of "HelloWorld_web" or "HelloWorldWeb". Within this folder, you can see a file "SilverLight.js". Copy this file and paste it into "C:\Program Files\Common Files\Microsoft Shared\web server extensions\12\TEMPLATE\LAYOUTS\1033". (Note: you should paste that file, only into this folder. Else, you will get an error".

2.  Create an Silverlight application and generate a XAP file.

3. Go to "c:\Inetpub\wwwroot\wss\VirtualDirectories\7070" and create a folder named "ClientBin" and give permission to Read & Write (for everyone). 

4. Go to IIS 

5. Go to Your SharePoint portal and make the "ClientBin" folder as a Virtual Directory.

6. Copy the Silverlight Application DLL & XAP file into this ClientBin folder.

7. Modify the Web.Config file to integrate the Silverlight. You can download a sample web.config file in the "download" section of http://www.codeplex.com/SL4SP

8. Create a Webpart. You can use WSPBuilder to create a Webpart. You can download a WSPBuilder from http://www.codeplex.com/wspbuilder

9. Add 2 references in WSP Project (System.Web.Extensions & System.Web.Silverlight)

10. In the WebpartCode, you must inherit the below 2 namespaces.
a. using System.Web.UI.SilverlightControls;
b. using System.Web.UI.WebControls;

11. Write a code to call the XAP file within the "CreateChildControls" method like. 
Silverlight sl = new Silverlight(); 
sl.ID = "MYSL"; 
sl.Source = "/ClientBin/SenSLMOSS.xap"; 
sl.Height = Unit.Pixel(420); 
sl.Width = Unit.Pixel(420); 
this.Controls.Add(sl);

12. "ScriptManager" code also should be placed inside the WebPart code. See the sample code below and this code should be inside the "OnLoad" method, like,

  protected override void OnLoad(EventArgs e) 
{
 if (!_error) 
try
 { 
base.OnLoad(e); 
ScriptManager sm = ScriptManager.GetCurrent(this.Page); 
if (sm == null) 
sm = new ScriptManager(); 
Controls.AddAt(0, sm); 
this.EnsureChildControls(); 
}
 catch (Exception ex) 
HandleException(ex); 
}


13.  Add & Deploy the WSP Webpart using stsadm command. 
(stsam -o addsolution -filename "C:\SLMOSSWebPart.wsp")

14. Create a "WebPart page and insert this webpart into that newly created page.

15. You will see an amazing SilverLight Page.

Thats  it...

Error: Could not complete the operation due to error 80000012

Reason: 

While integrating the Silverlight XAP files into MOSS 2007 webpart, you will get this error. Because, your given path may not be in correct format.


Answer:
You may have mentioned the XAP file path like "\ClientBin\HelloWorld.xap".
Instead, use like "/ClientBin/HelloWorld.xap"


Tuesday, August 25, 2009

Microsoft SharePoint Workspace 2010 download

Microsoft SharePoint Workspace 2010 download is locked due to over response. So, we are expecting the beta release at any time. 

However, As per their blogs, I am listing some of the key points of SharePoint Workspace 2010:

1.  Groove will be known as SharePoint Workspace Manager.
2.  SharePoint Server 2010 will be 64 bit only.
3.  IE 6.0 will not be supported.
4.  SharePoint Workspace Manager and OneNote will be a part of the Office 2010 ProPlus SKU.
5.  Migration should be smoother from 2007 to 2010 than 2003 to 2007.
6.  2010 will support silverlight controls effectively.
7.  Now, you can Insert/Delete data through BDC.
8.  Faceted search has been introduced.


I will update this post, If there is any latest news about Microsoft SharePoint Workspace 2010.


Monday, August 24, 2009

Error: HTTP 404: File Not Found in MOSS 2007 (SharePoint)

Error:  

HTTP 404: File Not Found. 

(Or)

SharePoint site can not be opened in SharePoint Designer.

Reason:

Usually this error will occur due to the below reasons:
1. If the portal is not attached with "Central Administration" portal.  i.e. The portal will be running        in IIS. But the Portal site may not be created in "Central Admin". 
2. The Port may not be associated with SSP.
3. Identity of the IIS application pool may be different. or the Application Pool Identity password may be changed. 

Solution:
1. Create a new "Web application" in the same port with the previous credentials & with the same database name through the "Application Management".  And don't create "Site Collection". (This is applicable, if the problem is due to Reason 1")

2. Associate the Port (Web application) with SSP, if the reason is 2.

3. Go to IIS and open the properties of the Application pool for this specific port and update the username,password in the "Identity" tab.

Important: 
Don't forget to restart the IIS. Else, your master pages will not take effect in the "Application pages".

Thursday, August 20, 2009

Hiding Menu in DispForm.aspx (MOSS 2007)

Sometimes, you may struggle to hide the "Menu Toolbar" which is displaying in the top of the Display Form page.


You may tried to hide by editing the page in SP Designer & writing Java Scripts. But they will not reflect in page. Because, you may forgot to add the "Push" method.

OK. So, here is an sample script, that will hide the "Menu Toolbar" from the DispForm.aspx.

<script language="javascript" type="text/javascript">
function check()
{
var elements=document.body.getElementsByTagName("a");
for (var index=0; index <>
{
if(elements[index].title.toLowerCase()=="edit item")
elements[index].parentNode.parentNode.parentNode.parentNode.parentNode.parentNode.style.display="none";
}
}  
var elements=document.body.getElementsByTagName("td");
for (var index=0; index <>
{
if(elements[index].innerText.toLowerCase()=="itemworkspaceurl")
elements[index].parentNode.style.display="none";
}
}  
}
_spBodyOnLoadFunctionNames.push("check()");
</script>


Once you have applied this script, final screen will be like,


That's It...

Wednesday, August 19, 2009

System.Security.Policy.PolicyException: Required permissions cannot be acquired.

ErrorSystem.Security.Policy.PolicyException: Required permissions cannot be acquired.

Reason:
The Trust level may be Mimimal.

Solution:
1.  Go  to C:\Program Files\Common Files\Microsoft Shared\Web Server Extensions\12\config
2.  Open "Web.Config"
3.  Find <trust level="WSS_Mimimal" originurl=""></trust>
4.  Replace by <trust level="Full" originurl=".*"></trust>
5.  Save and Exit
6.  Open your Sharepoint Website web.Config.
7.  Do the steps 3 & 4.
8.  Save and Exit

That's It...

'truncate_only' is not a recognized BACKUP option.

Error:

'truncate_only' is not a recognized BACKUP option.

Reason:
This error will occur, if you run the 'Backup Log' query in 'SQL Server 2008'. Because, SQL Server 2008 will not support this command. 

Your Query: backup log WSS_Content_5001 with truncate_only

Solution:

So, you have to run query in the below format.

Use DBName
GO
Alter Database DBName Set Recovery Simple
GO
Alter Database DBName Set Recovery Full
GO
DBCC SHRINKFILE ('Log Name', 1) 

That's it...

Friday, August 7, 2009

Error: Unable to extract manifest.xml from:

Reason:
Sometime you will get the "Unable to extract manifest.xml from:" error, when you are trying to deploy WSP files using WSPBuilder. Mostly this error will occur, if you are using 64bit Windows 2003 server. 

Solution:
1. Go to http://wspbuilder.codeplex.com/Release/ProjectReleases.aspx?ReleaseId=30858 and download 64bit WSPbuilder with IIS7 support. (Version 1.0.6)
2. Also, download the "cablib.dll" from the same url. (Important)
3. Install the downloaded WSPBuilder in that server.
4. Goto command prompt & type "Assembly" (Without quotes). This will open Asseembly folder. Or go to "C:\windows\Assembly\" (Both actions are same)
5. Drag and drop the "cablib.dll" into the "Assembly" folder. (Important)

Thats it. 

Thursday, August 6, 2009

Error: The list is too large to save as a template. The size of a template cannot exceed 10485760 bytes.

Reason:

By default, Microsoft has restricted the download size of the list template as 10MB (10485760 bytes). If you are trying to save site/list template which are having more than 10MB size, you will get "The list is too large to save as a template. The size of a template cannot exceed 10485760 bytes." error. 

To resolve this issue, you have to run the below command in the command prompt:
stsadm -o setproperty -propertyname max-template-document-size -propertyvalue 524288000


In my above command, I have set template limit as 500MB. 


Error: The template you have chosen is invalid or cannot be found

Reason: 
Day by day, your MOSS server's number of features (under C:\Program Files\Common Files\Microsoft Shared\web server extensions\12\TEMPLATE\FEATURES) will increase gradually. During the deployment, the target server may not have all the source machine features. 

So, you will get the "The template you have chosen is invalid or cannot be found" error. If you are removed the unnecessary dependant features, your "Workspace template" will work fine. 

Solution:
However, the solution is somewhat hectic. Just follow my instructions carefully. (Don't miss any step and don't ignore the naming convension.)

1. Download the STPInspector from Codeplex (http://stpinspector.codeplex.com/Release/ProjectReleases.aspx)
2. Downloaded CabArc from Microsoft (http://support.microsoft.com/kb/310618)
3. Copy STSInspector tool into MOSS Server (Important)
4. Extract Cabarc files into C:\cabarc (Follow the same name as specified here)
5. Download STP from the portal through browser. (http://Portal:80/_catalogs/wt/Forms/Common.aspx)
6. Browse & Inspect the downloaded stp using STPInspector
7. Note the Missing features GUID (which are not ticked in the result list)
8. Rename the STP file as .CAB 
9. use the CabArc to extract the contents into the folder (ex: Cabarc X Project.cab)
10.Open the Manifest.xml in notepad from the extracted files
11.Search the missing guid (which are found using STPInspector) and delete the Feature XML tag in the Manifest.XML.
12. Save the Manifest.xml
13. Make the new CAB using CabArc (Ex: CabArc N ModifiedProject.cab C:\Folder\*.*)
14. Rename the .CAB file as .STP
15. Upload this file using stsadm -o addtemplate -filename "C:\ModifiedProject.STP" -Title "STPTitle" -Description ""


Thats it. 

Thursday, July 16, 2009

Failed to instantiate file "TopAnswer.webpart" from module

Error:

Failed to instantiate file "TopAnswer.webpart" from module "WebPartPopulation": Source path "dwp\TopAnswer.webpart" not found. Troubleshoot issues with Windows SharePoint Services.

Solution:

This error will occur, if you applied only the WSS 3.0 SP2. You may not installed Office Server SP2.

I wrote a simple solution in another post. Just go through the url and install Office Server SP2.


MOSS 2007 Database Attach Error

Error:
The specified SPContentDatabase Name=WSScontent_2009 Parent=SPDatabaseServiceInstance Name=Microsoft##SSEE has been upgraded to a newer version of SharePoint. Please upgrade this SharePoint application server before attempting to access this object


Solution:

Dont get confused with other solutions. Just install Moss 2007 SP2. Thats it.

Google about "wssv3sp2-kb953338-x86-fullfile-en-us.exe" and install this service pack first. And then install "officeserver2007sp2-kb953334-x86-fullfile-en-us.exe"

Sometimes you will get error during the Office Server SP2 (Not WSS 3.0 SP2). At that time, try to extract the MOSS SP2 in some other location and then execute the .msp file from the newly extracted folder.

Command to extract the exe: 
officeserver2007sp2-kb953334-x86-fullfile-en-us.exe /extract:"c:\mosstemp\"
Once the files are extracted, execute the "coreserverwwsp2.msp" file.

Thats it...